A lot of you might have heard about Lens Protocol. It’s a new Web3 social graph protocol built by the Aave team. To solve a lot of significant issues in social media that we are currently using. For more details about Lens Protocol you can check out their documentation at https://docs.lens.xyz/docs/what-is-lens
Introduction
The Lens Protocol is a Web3 social graph on the Polygon Proof-of-Stake blockchain. It is designed to empower creators to own the links between themselves and their community, forming a fully composable, user-owned social graph. The protocol is built from the ground up with modularity in mind, allowing new features and fixes to be added while ensuring immutable user-owned content and social relationships.
— https://docs.lens.xyz/docs/what-is-lens
This article aims to be a small article in that we’re going to explore how we can use Laika to interact with Lens Protocol (It’s going to be a fairly short article)
But here’s the list of what we’re going to do. In which I hope you could get a glimpse of how you can interact with Lens Protocol through Laika
What we’re going to do
- We going to explore Lens Protocol on Polygon Mumbai Testnet
- Create our own Lens Handle (xxx.lens) through MockProfileCreationProxy contract
- Create a new post on Lens through LensHub Proxy
Lens Protocol Overview
The team at Lens Protocol designed it to be modular. this is so it is easy to scale the community of Lens Protocol itself. Lens Protocol tokenizes a lot of functionality into ERC721-compliant. So if someone wanted to add more features to Lens Protocol. They just write a new module and then plug it into it. Simple as that!
The smart contract that you’ll be going to interact with a lot is called “Lens Hub”. This is where Lens Protocol places the entry point for the majority of interactions with its protocol.
For the list of contracts deployed on each chain you can look for it here: https://docs.lens.xyz/docs/deployed-contract-addresses
Before beginning with anything make sure you have MATIC in your wallet on Mumbai Testnet. You can request tokens here https://faucet.polygon.technology/
Create Lens Profile
To create a Lens Profile on Polygon Mumbai is using a little bit different way than other interactions. As I wrote above that you’ll have to interact with Lens Hub. Well, this is not the case haha.
Lens Protocol has a whitelist of people who could create a Lens Profile. Typically, Our address is not in there. But we could create Lens Profile by creating it through the MockProfileCreationProxy contract. Which is going to be a proxy that gave us permission to create a new Profile.
For Polygon Mumbai MockProfileCreationProxy is deployed at 0x420f0257D43145bb002E69B14FF2Eb9630Fc4736
Alright! Let’s do it then.
To make it easier for you guys to follow this tutorial. I exported collections that we’re going to use in this article. You can download it from gist here.
Then open Laika at web.getlaika.app Click on Import Collection. Then drop in the JSON file you just downloaded.
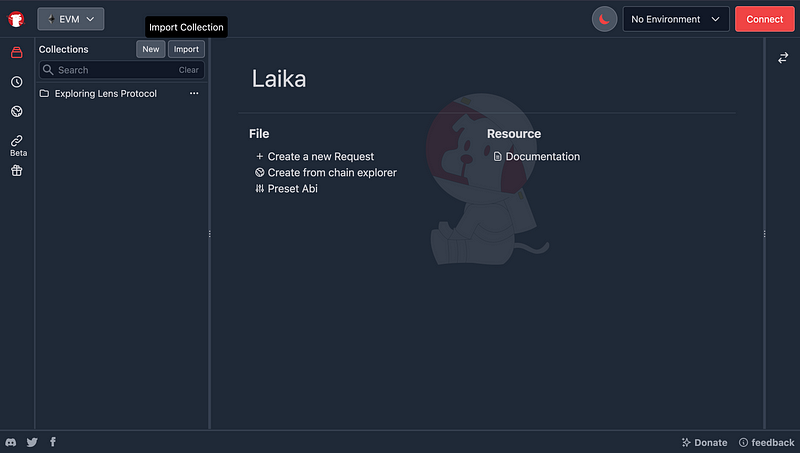
You’re going to see lists of requests that I’ve prepared. Feels free to look around!
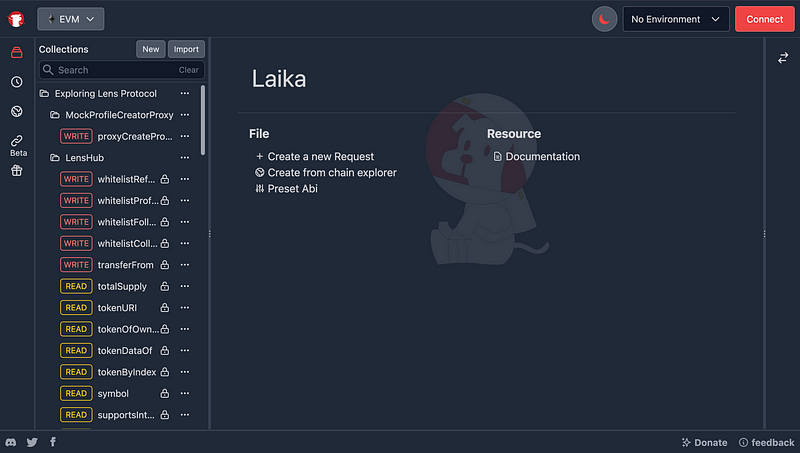
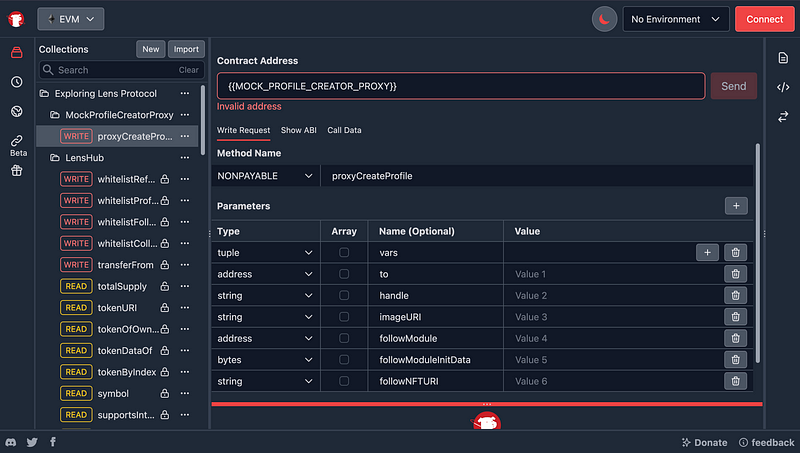
The request that we’re going to use to create a profile is called “proxyCreateProfile” so let’s get to it!
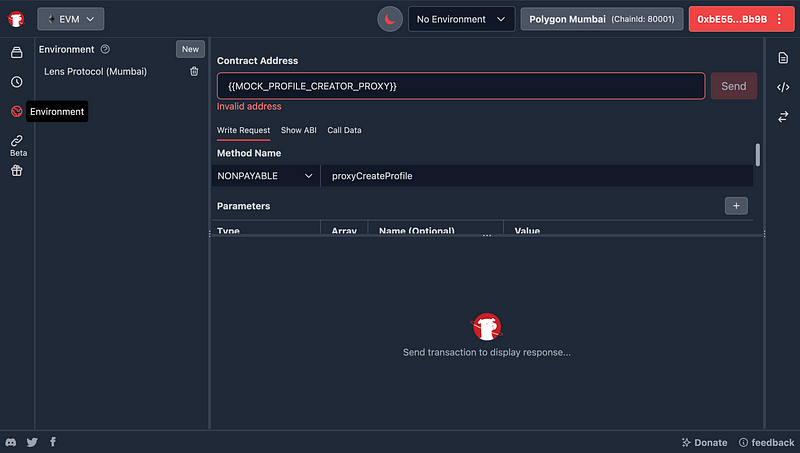
But before we’re doing anything you’ll notice that. it shows an Invalid address under the contract address field. This is because I put in the environment variable with the name MOCK_PROFILE_CREATOR_PROXY.
We have to set this up before going next!
Let’s hit the environment variables button (The globe icon) on the left side of the UI. Then hit New Button to create a new one.
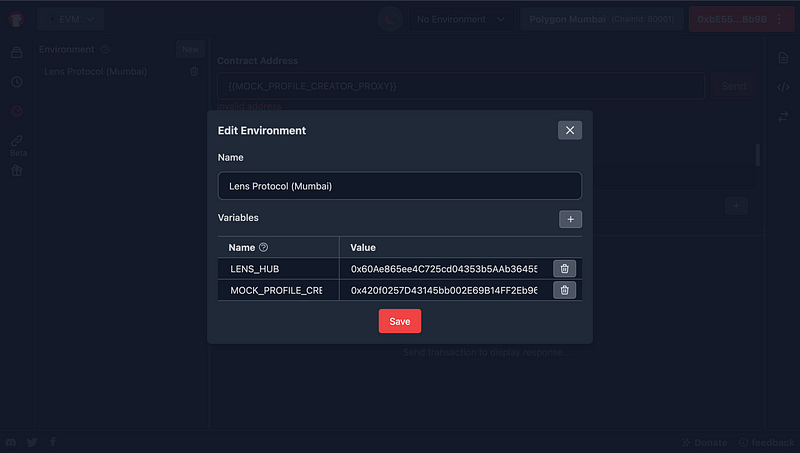
Now just add new variables to it.
Here I added
LENS_HUB = 0x60Ae865ee4C725cd04353b5AAb364553f56ceF82
MOCK_PROFILE_CREATOR_PROXY = 0x420f0257D43145bb002E69B14FF2Eb9630Fc4736
Which is address of both of these contracts on Polygon Mumbai
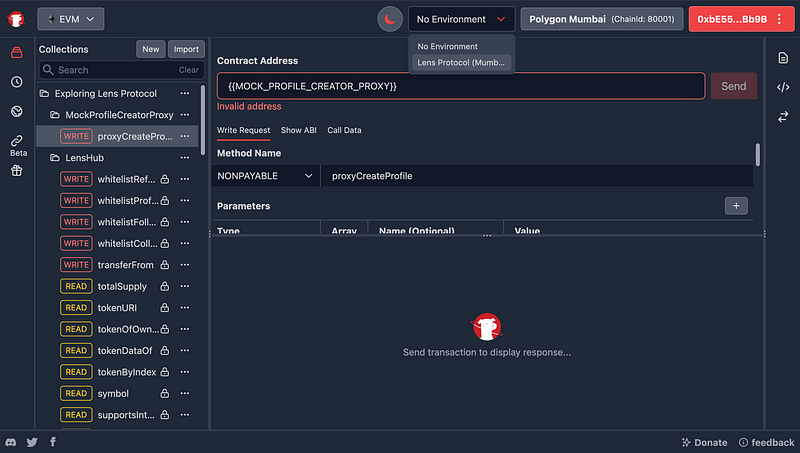
And then change our Environment variables to the environment we just created.
Now Let’s fill in the parameters.
to = your address
handle = your desired lens handle
imageURI = link to your profile pic
followModule = address to follow module (This is add when you want some fancy logic happen when someone follow you. In this case we just put Null Address to it)
followModuleInitData = data that use to initialized follow module
followNFTURI = uri for followNFT
And here is a list of what I put
to = <My Address>
handle = <My Desired Handle>
imageURI = /content/images/ipfs/qmy9duwyu67puawbmxrkw98lpbxcznpwhubhx5newncjbx.jpg
followModule = 0x0000000000000000000000000000000000000000
followModuleInitData = 0x00
followNFTURI = /content/images/ipfs/qmtflsxdeq6qsszaxacsntiv6wa56qq87ytxj182dxdqjs.jpg
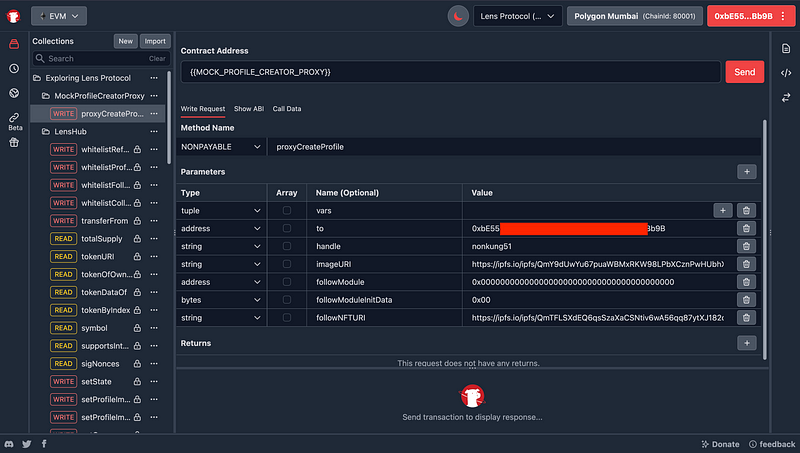
Now that you filled all of the parameters. Let’s go ahead and click send to create a new Profile!
And then after the transaction is complete. You’re going to have a new Lens Profile of yourself. (You can check the transaction at Polygonscan to verify it too)
Let’s see what it looks like!
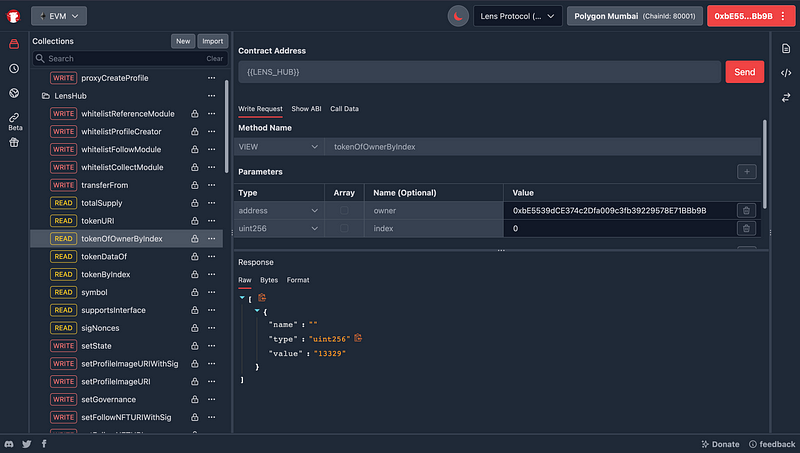
I go to tokenOfOwnerByIndex of LensHub contract. go ahead and just out our address (That we just minted a new profile by) and index of 0
It’s going to return us the tokenID of our profile. So that we can use it to query for data again via getProfile request.
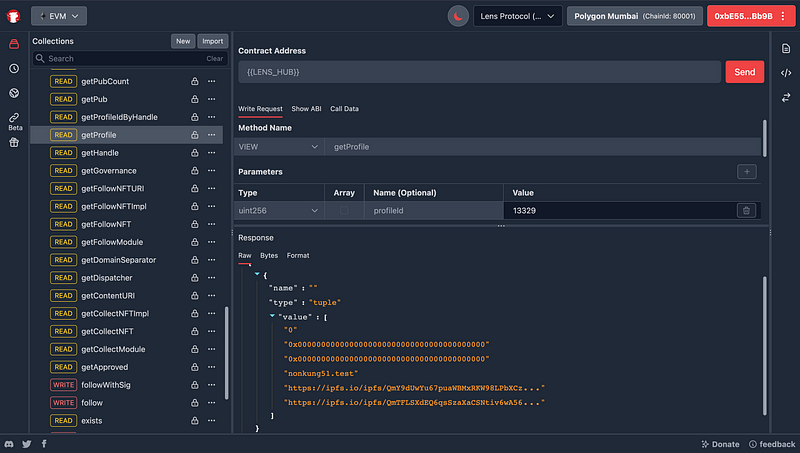
Now I just query for the getProfile method. You’ll see the details of my Lens Profile here.
There are also a lot of other methods to call to get data like tokenURI, tokenDataOf But I’ll leave it for you guys to check out!
Tips: We’re going to reuse ProfileID a lot it will be really handy if we store it as a Environment Variable!
Publish a Post
Now that we have our own Lens Profile. Let’s get to create a new post!
Just look for the method post inside the Lens Hub folder. This is the method we’re going to use to publish a post.
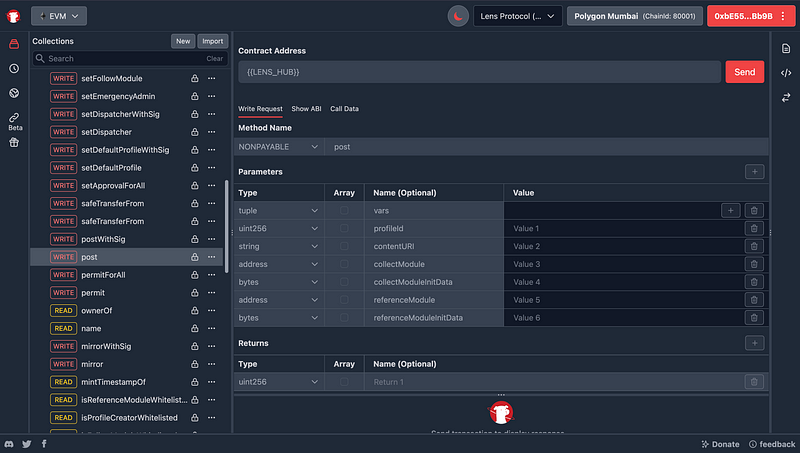
Now Let’s fill in the parameters
profileId = your profile id from previous
contentURI = URI to the content of the post
collectModule = address to collect module (remember about follow module? this is similar to it. since anyone can collect any post you who post the content can specify how the collect process is going to be like)
collectModuleInitData = data that use to initialized collect module
referenceModule = address to reference module
collectModuleInitData = data that use to initialized reference module
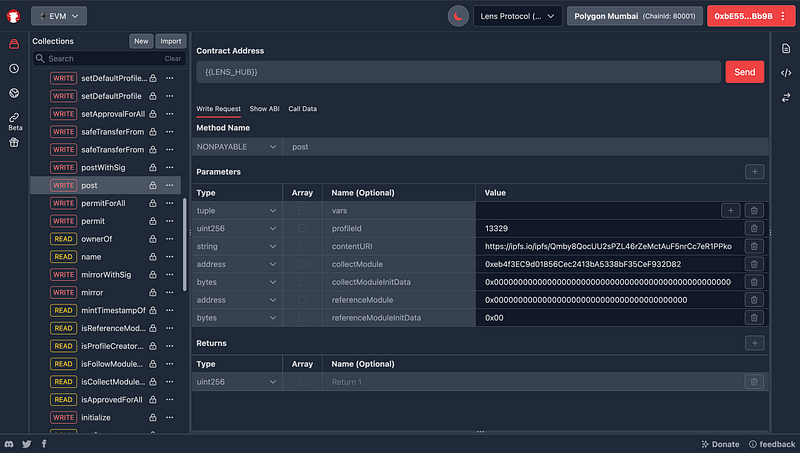
Again here’s a list of what I put
profileId = 13329
contentURI = https://ipfs.io/ipfs/Qmby8QocUU2sPZL46rZeMctAuF5nrCc7eR1PPkooCztWPz
collectModule = 0x0BE6bD7092ee83D44a6eC1D949626FeE48caB30c
collectModuleInitData = 0x0000000000000000000000000000000000000000000000000000000000000001
referenceModule = 0x0000000000000000000000000000000000000000
collectModuleInitData = 0x00
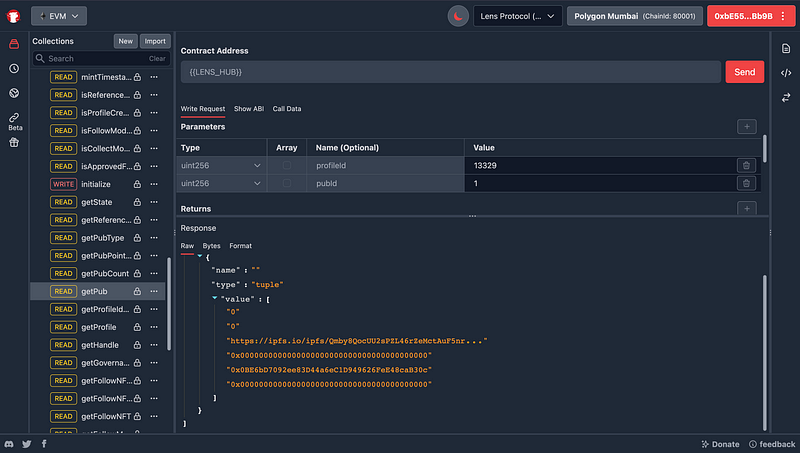
And after we publish a new post you can read it using method getPub
Here I put pubId = 1 because the index in Lens starts with 1!
And Wallah! We’ve got our post now!
And that’s it! We just create a new Lens Profile and Publish a new post on Lens Protocol! For more information about Lens Protocol please refer to their official documentation at https://docs.lens.xyz/docs
That’s all for this article. Hope you guys like it! See you again next time! 😃
Connect with us
Facebook: https://www.facebook.com/getlaikaapp/
Discord: https://discord.gg/4DzwHuxhcf
Twitter: https://twitter.com/getlaikaapp